- QATestLab Blog >
- QA Basics >
- Testing Tools >
- Selenium >
- Selenium Auto Accept Self Signed SSL Certificates and Basic Authentication
Selenium Auto Accept Self Signed SSL Certificates and Basic Authentication

One of my biggest annoyances and unresolved issues with Selenium is the self-signed SSL certificates. This was a huge issue for me on the last project when we had dozen test runners and the same amount of servers behind load balancers all with invalid SSL certificates. The terrible solution at the time was to add the certificate to my Firefox profile and keep updating it every other day.
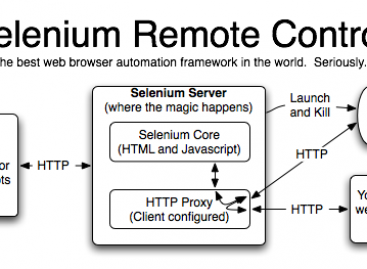
Good news! Selenium server has some cool things built into it, that will make your life much easier. First, always Accept SSL certificates; Second, allow basic authentication to be automatically passed down to every page you try to access.
I have to thank this kind person for posting this info:
- http://mogotest.com/blog/2010/04/13/how-to-accept-self-signed-ssl-certificates-in-selenium
- http://mogotest.com/blog/2010/06/23/how-to-perform-basic-auth-in-selenium
Let’s get started
1) Use selenium server as a proxy
This is a major one, once you configure your browser to use the RC server as a proxy you get a lot of things for free. The easiest way to accomplish this step on firefox is to create a custom firefox profile that you will use to test (See custom selenium profiles) and add the HTTP and SSL proxy to be pointing to “localhost” port “4444″.
Note: Make sure you are not using “-avoidProxy” flag when you are launching the selenium server
2) Enable acceptance of all Self Signed SSL certificates
Use ”
3) Trust the CiberVillan certificate
cybervillainsCA.cer comes packaged with selenium server, look under sslSupport folder. You will need to install this certificate in your browsers.
For Firefox, just drag this certificate into the opened browser while it is running in your selenium testing profile
For IE, you will have to follow the CiberVillan certificate installation on the system.
4) Enable automatic basic authentication
To have basic authentication, we just need to add your username and password to all of the request headers. In ruby this is done with this code snippet:
@browser = Selenium::Client::Driver.new \

:host => "localhost",

:port => 4444,

:browser => "*firefox",

:url => "http://localhost:4444",

:timeout_in_second => 20
encoded = Base64.encode64("USERNAME:PASSWORD").strip

@browser.remote_control_command('addCustomRequestHeader', ['Authorization', "Basic #{encoded}"])
Note: Make sure your initial URL is pointing to localhost, you do not want to hit your domain yet because we have not added the authentication header until the last 2 lines
5) Start running your test
All you have to do now is tell the browser to hit your site
Source: http://agilesoftwaretesting.com
Learn more from QATestLab
Related Posts:
- Selenium Testing – The Bright and the Dark Sides
- Selenium 2 makes automation debugging easier
- Automation tools: the solution to all test problems or a waste of time?


u had given a very good information about selenium self signed and basic authentication it is very good.